Campfire Cones are such a fun and easy treat, perfect for your next camping trip, bonfire, or even just a fun backyard gathering!
I love how customizable they are – you can really stuff them with anything your heart desires. They’re basically like a s’more, but with way more potential for deliciousness.
Plus, they are cooked to perfection, offering a nice warm, gooey dessert.
Campfire Cones Recipe Overview
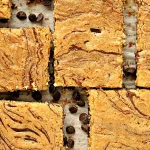
Campfire Cones are essentially waffle cones filled with all sorts of goodies, wrapped in foil, and then warmed over a campfire (or in an oven!).
They’re melty, gooey, and super satisfying, and the flavor combinations are endless. Think of them as a highly customizable, hand-held dessert experience.
They are known for the warm feeling, which I like a lot.
You can serve them as a fun dessert, a sweet snack, or even a playful addition to a brunch spread. I honestly can’t put a label for when they’re best enjoyed. I mean, warm cones, filled with goodness, who wouldn’t want that?
Ingredients for Campfire Cones

Here’s what you’ll need to gather:
- Waffle Cones: The foundation of our treat! Choose regular-sized waffle cones, not sugar cones.
- Mini Marshmallows: A classic for a reason! They get perfectly melty.
- Chocolate Chips: I like using semi-sweet, but milk chocolate or dark chocolate works great too. You can also use chocolate chunks.
- Peanut Butter Chips: These add a lovely, nutty flavor that complements the chocolate.
- Chopped Fruit (Optional): Strawberries, bananas, raspberries – whatever you like! Just make sure the pieces are small.
- Caramel Candies (Optional): For an extra gooey, caramel-y kick.
- Other Fillings (Get Creative!): Crushed cookies, sprinkles, nuts, coconut flakes – the sky’s the limit. Consider adding some nuts to add that crunchy texture.
- Aluminum Foil: Heavy-duty foil is best for wrapping and cooking.
Ingredient Note: If you’re making these for someone with a peanut allergy, just leave out the peanut butter chips and double-check all your other ingredients.
Step-by-Step Instructions for Making the Best Campfire Cones
- Prepare Your Workstation: Lay out a large sheet of aluminum foil for each cone you plan to make. Have all your fillings within easy reach.
- Layer the Goodies: Start by adding a small layer of mini marshmallows to the bottom of the cone. This helps prevent the chocolate from sticking to the bottom.
- Add Your Fillings: Now, get creative! Layer in your chocolate chips, peanut butter chips, fruit (if using), caramel candies, and any other fun fillings you’ve chosen. Don’t overfill the cone – leave a little space at the top.
- Top with Marshmallows: Add another layer of mini marshmallows on top. This will create that classic gooey s’more texture.
- Wrap It Up: Carefully bring the sides of the foil up and around the cone, twisting the top to seal it completely. You want it to be well-sealed to prevent any leaks and to trap the heat.
- Get it Warm: Campfire Method: Place the wrapped cones near the hot coals of your campfire, but not directly in the flames. You want gentle, indirect heat. Rotate them every few minutes for even cooking. They should be ready in about 5-7 minutes, depending on the heat of your fire.
Oven Method: Preheat your oven to 350°F (175°C). Place the wrapped cones on a baking sheet and bake for 7-10 minutes, or until the fillings are melted and gooey. - Careful Unwrapping: Use tongs or oven mitts to remove the cones from the fire or oven – they’ll be HOT! Let them cool for a couple of minutes before carefully unwrapping. The foil will be hot, and the fillings will be molten.
- Enjoy!: Dig in while they’re warm and gooey!
Variations & Tips for Your Campfire Cones
- S’mores Style: Stick to the classic combination of marshmallows, chocolate, and graham crackers (crushed and sprinkled inside).
- Nutty Delight: Add chopped pecans, walnuts, or almonds for a crunchy texture.
- Fruity Fun: Use a mix of berries for a bright, fresh flavor.
- Make-Ahead: You can assemble the cones ahead of time, wrap them in foil, and store them in the fridge or a cooler until you’re ready to cook them.
- Storage: Leftover (cooled) cones can be stored in an airtight container at room temperature for a day or two, but they’re best enjoyed fresh.
- Reheating: If you need to reheat them, you can pop them back in the oven (still wrapped in foil) at 350°F (175°C) for a few minutes, or warm them near a campfire.
- Serving Suggestions: Serve them with a scoop of ice cream for an extra decadent treat, or with a glass of cold milk.
Key Details
- Prep time: 10 minutes
- Cook time: 5-10 minutes
- Total time: 15-20 minutes
- Servings: Varies, depending on how many cones you make.
- Equipment you’ll need: Aluminum Foil, Mixing Bowls (if preparing multiple fillings), Tongs or Oven Mitts.

Campfire Cones
Ingredients
- Waffle Cones
- Mini Marshmallows
- Chocolate Chips
- Peanut Butter Chips
- Chopped Fruit Optional
- Caramel Candies Optional
- Crushed cookies sprinkles, nuts, coconut flakes (Optional)
- Aluminum Foil
Instructions
- Lay out aluminum foil sheets.
- Add marshmallows to the bottom of each cone.
- Layer in chocolate chips, peanut butter chips, fruit, caramel, and other fillings.
- Top with marshmallows.
- Wrap cones in foil, twisting to seal.
- For campfire: Place near hot coals for 5-7 minutes, rotating. For oven: Preheat to 350°F (175°C), bake for 7-10 minutes.
- Let cool slightly before unwrapping carefully.
- Enjoy warm!