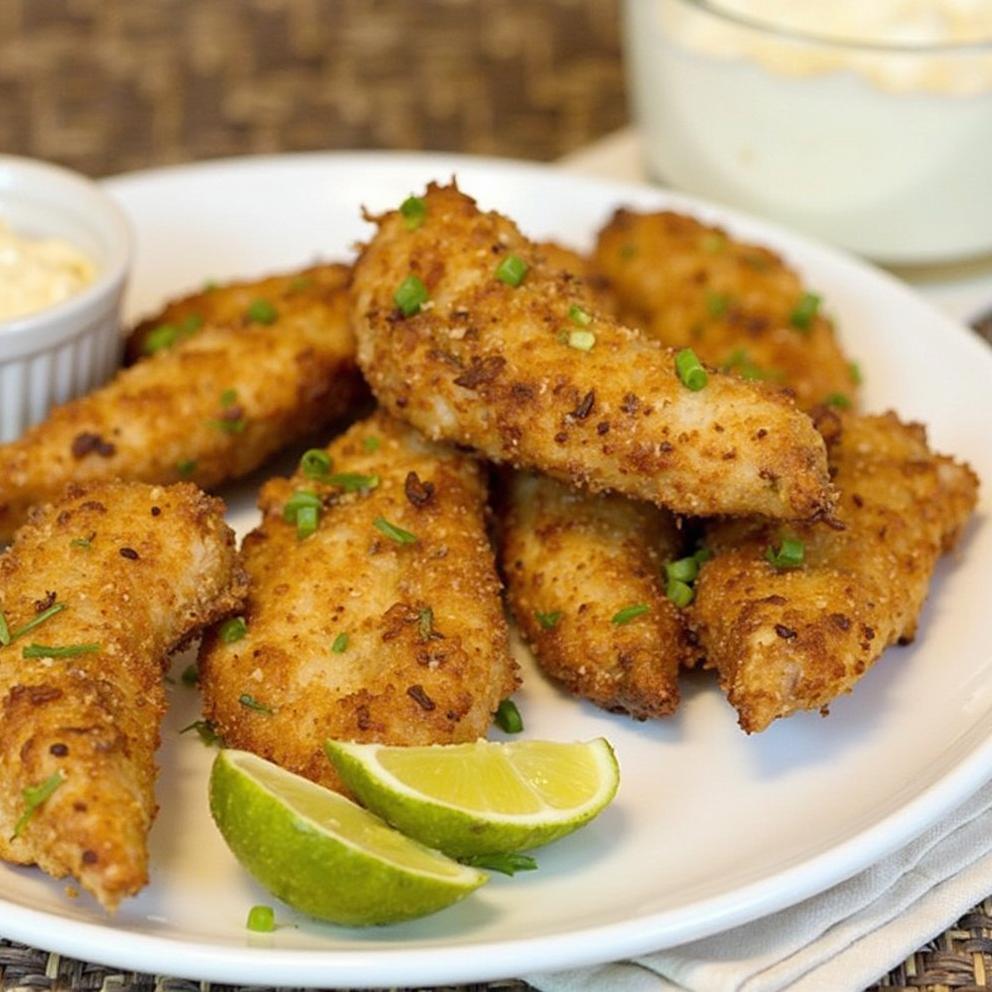
Dill Pickle Brined Chicken Tenders are my new favorite, and I can’t wait to show you how to make them! They’re great for a fast dinner during the week, a fun snack for watching sports, or even for making meals ahead of time.
The secret to these tenders is the special liquid they soak in. It’s not just any liquid – it’s dill pickle juice! This sour and tasty juice does wonders, making the chicken super juicy and soft.
Recipe Overview
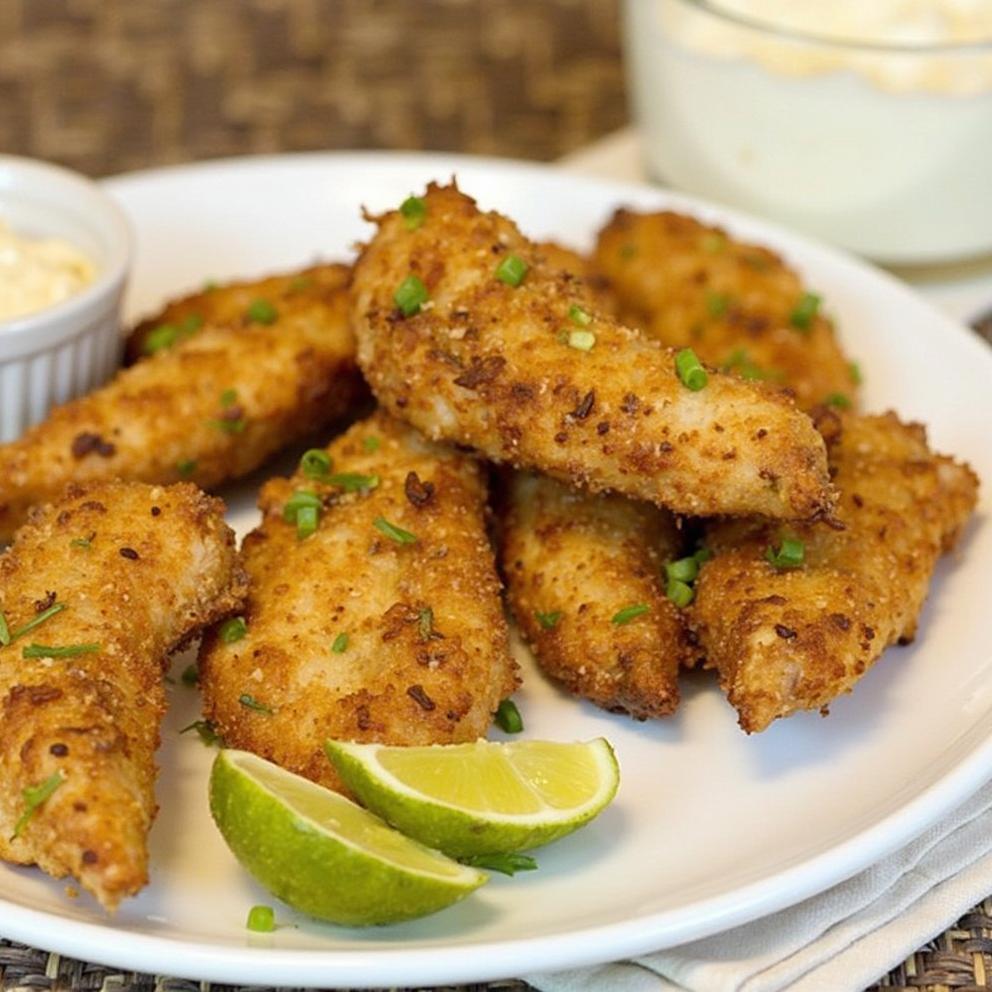
These Dill Pickle Brined Chicken Tenders are packed with flavor! Imagine chicken that’s crispy and golden on the outside, and super juicy and tasty on the inside. The dill pickle juice gives them a little bit of a sour kick and a lot of juiciness.
They’re awesome by themselves, dipped in your favorite sauce.
Try them with honey mustard, ranch, or even a spicy sauce.
You can also put them on salads, in wraps, or with sides like fries or coleslaw. It’s an easy recipe that has a lot of flavor!
Ingredients for Dill Pickle Brined Chicken Tenders
Here’s what you need to make these yummy tenders:
- 1 ½ pounds of boneless, skinless chicken tenders
- 1 ½ cups of dill pickle juice (the juice from a jar of dill pickles)
- 1 cup of all-purpose flour
- 1 teaspoon of salt
- ½ teaspoon of black pepper
- ½ teaspoon of garlic powder
- ½ teaspoon of onion powder
- ½ teaspoon of paprika
- ¼ teaspoon of dried dill
- 1 big egg
- ½ cup of milk
- Vegetable oil, for frying
For the pickle juice, just use the juice from your favorite jar of dill pickles. You don’t have to buy anything extra!
If you don’t have chicken tenders, you can use boneless, skinless chicken breasts. Just cut them into strips that are 1 inch wide.
If you can’t eat gluten, you can use a gluten-free flour instead of all-purpose flour. Make sure it can be used in the same amount.
Step-by-Step Instructions
Let’s start cooking!
- Soak the Chicken: In a big bowl or a plastic bag that seals, put the chicken tenders and the dill pickle juice together. Make sure all the chicken is covered by the juice. Put a lid on the bowl or close the bag and put it in the fridge for at least 30 minutes, or up to 4 hours. The longer it soaks, the more flavor it will have!
- Get the Coating Ready: While the chicken is soaking, get your coating stuff ready. You’ll need two dishes that aren’t very deep. In the first dish, mix together the flour, salt, pepper, garlic powder, onion powder, paprika, and dried dill.
- In the second dish, mix the egg and milk until they’re combined.
- Coat the Chicken: Take the chicken tenders out of the juice, and let any extra juice drip off. Throw away the pickle juice. One at a time, roll each chicken tender in the flour mix, pressing a little to cover it all over.
- Then, dip it in the egg mix, making sure it’s all covered.
- Finally, roll it in the flour mix again, pressing to make a good, thick coating. Doing this double coating is how you get extra crispy tenders!
- Fry the Chicken: Heat about ½ inch of vegetable oil in a big pan on medium-high heat. You’ll know the oil is ready when a tiny bit of flour sizzles right away when you drop it in.
- Carefully put the coated chicken tenders in the hot oil, making sure not to put too many in the pan at once. You might need to cook them in a few batches.
- Fry the chicken for about 3-4 minutes on each side, until it’s golden brown and cooked all the way. The chicken should reach 165°F (74°C) inside. You can use a meat thermometer to check.
- Drain and Eat: Take the cooked chicken tenders out of the pan and put them on a plate with paper towels to get rid of any extra oil. Eat them right away with your favorite dipping sauces.
Variations & Tips
- Make it Spicy: Add a little bit of cayenne pepper to the flour mix if you want a bit of a kick.
- Air Fryer: If you want a healthier way to cook them, you can use an air fryer. Heat your air fryer to 400°F (200°C) and cook the tenders for about 10-12 minutes, flipping them over halfway through.
- Make Ahead: You can soak the chicken and get the coating stuff ready before you’re ready to cook. Keep them in the fridge separately until it’s time to cook.
- Leftovers: You can keep leftover chicken tenders in a sealed container in the fridge for up to 3 days.
- Reheating: To reheat, put them in the oven at 375°F (190°C) for about 10-15 minutes, or until they’re hot and crispy again. You can also reheat them in the air fryer.
- Put them on small buns with some extra pickles and ranch for mini chicken burgers.
Key Details for Dill Pickle Brined Chicken Tenders
- Prep time: 15 minutes (plus time for soaking)
- Cook time: 15 minutes
- Total time: 30 minutes (plus time for soaking)
- Servings: 4-6 people
- Things you’ll need: Big bowl or bag that seals, two shallow dishes, big pan, paper towels.
FAQ
How long should I soak the chicken?
You should soak the chicken for at least 30 minutes, but you can soak it for up to 4 hours. The longer it soaks, the more flavorful and juicy it will be.
Can I use chicken breasts instead of tenders?
Yes, you can use boneless, skinless chicken breasts. Just cut them into strips that are 1 inch wide before soaking.
Can I bake these instead of frying?
Yes, you can bake them! Heat your oven to 400°F (200°C) and bake for about 20-25 minutes, flipping them over halfway through, or until they’re golden brown and cooked all the way.
What kind of oil should I use for frying?
Vegetable oil is good for frying because it can get very hot without burning. You can also use canola oil or peanut oil.
How do I know when the chicken is cooked all the way?
The best way to know is to use a meat thermometer. The chicken should reach 165°F (74°C) inside. If you don’t have a thermometer, you can cut into one of the tenders – the juice should be clear, and the meat should be white, not pink.
Can I use a different kind of pickle juice?
Dill pickle juice is the main flavor in this recipe, but you could try other kinds of pickle juice, like bread and butter pickle juice or spicy pickle juice. Just remember that the flavor will be different.

Dill Pickle Brined Chicken Tenders
Ingredients
- 1 ½ pounds of boneless skinless chicken tenders
- 1 ½ cups of dill pickle juice
- 1 cup of all-purpose flour
- 1 teaspoon of salt
- ½ teaspoon of black pepper
- ½ teaspoon of garlic powder
- ½ teaspoon of onion powder
- ½ teaspoon of paprika
- ¼ teaspoon of dried dill
- 1 big egg
- ½ cup of milk
- Vegetable oil for frying
Instructions
- In a big bowl or a plastic bag that seals, put the chicken tenders and the dill pickle juice together. Make sure all the chicken is covered by the juice. Put a lid on the bowl or close the bag and put it in the fridge for at least 30 minutes, or up to 4 hours.
- In the first dish, mix together the flour, salt, pepper, garlic powder, onion powder, paprika, and dried dill.
- In the second dish, mix the egg and milk until they're combined.
- Take the chicken tenders out of the juice, and let any extra juice drip off. Throw away the pickle juice. One at a time, roll each chicken tender in the flour mix, pressing a little to cover it all over.
- Then, dip it in the egg mix, making sure it's all covered.
- Finally, roll it in the flour mix again, pressing to make a good, thick coating.
- Heat about ½ inch of vegetable oil in a big pan on medium-high heat.
- Carefully put the coated chicken tenders in the hot oil, making sure not to put too many in the pan at once.
- Fry the chicken for about 3-4 minutes on each side, until it's golden brown and cooked all the way. The chicken should reach 165°F (74°C) inside.
- Take the cooked chicken tenders out of the pan and put them on a plate with paper towels to get rid of any extra oil. Eat them right away with your favorite dipping sauces.


